Transfer files and folders to an iPhone or iPad App from a Mac or PC
Updated on Mar 16, 2026
Reading time ~4 minutes
iPhone, iPad and iPod touch do not have centralised file systems. Instead, each app has its own folder called sandbox. An app's sandbox is not shared with other apps, and is not accessible from a computer.
However, some iOS apps let you access their sandbox's Documents folder. These are referred to as File Sharing enabled apps. Simply put, these apps let you browse, upload and download files in their Documents folder.
iTunes / Finder provides a limited and simplistic interface to add, copy, or delete files from file sharing enabled apps.
iMazing provides a much more full-featured way of interacting with file sharing enabled apps, via USB or Wi-Fi. It greatly expands on what is possible with iTunes:
Browse and transfer folder hierarchy
Preview files
Rename files and folders
Display items in multiple view types (list, icons, columns)
Sort files by name, date, size, or kind
List all ongoing transfer operations
All file sharing enabled apps are not created equal. What app is right for you will greatly depend on the type of document you want to use it with. In this guide, we use Documents, but the instructions below apply to any file sharing enabled apps such as VLC or Kindle.
See the Going Further section at the end of this article for a list of our favorite compatible apps and instructions for app developers on how to make your app compatible with File Sharing.
Here is how to Transfer Files and folders to an iPhone or iPad App from a Mac or PC:
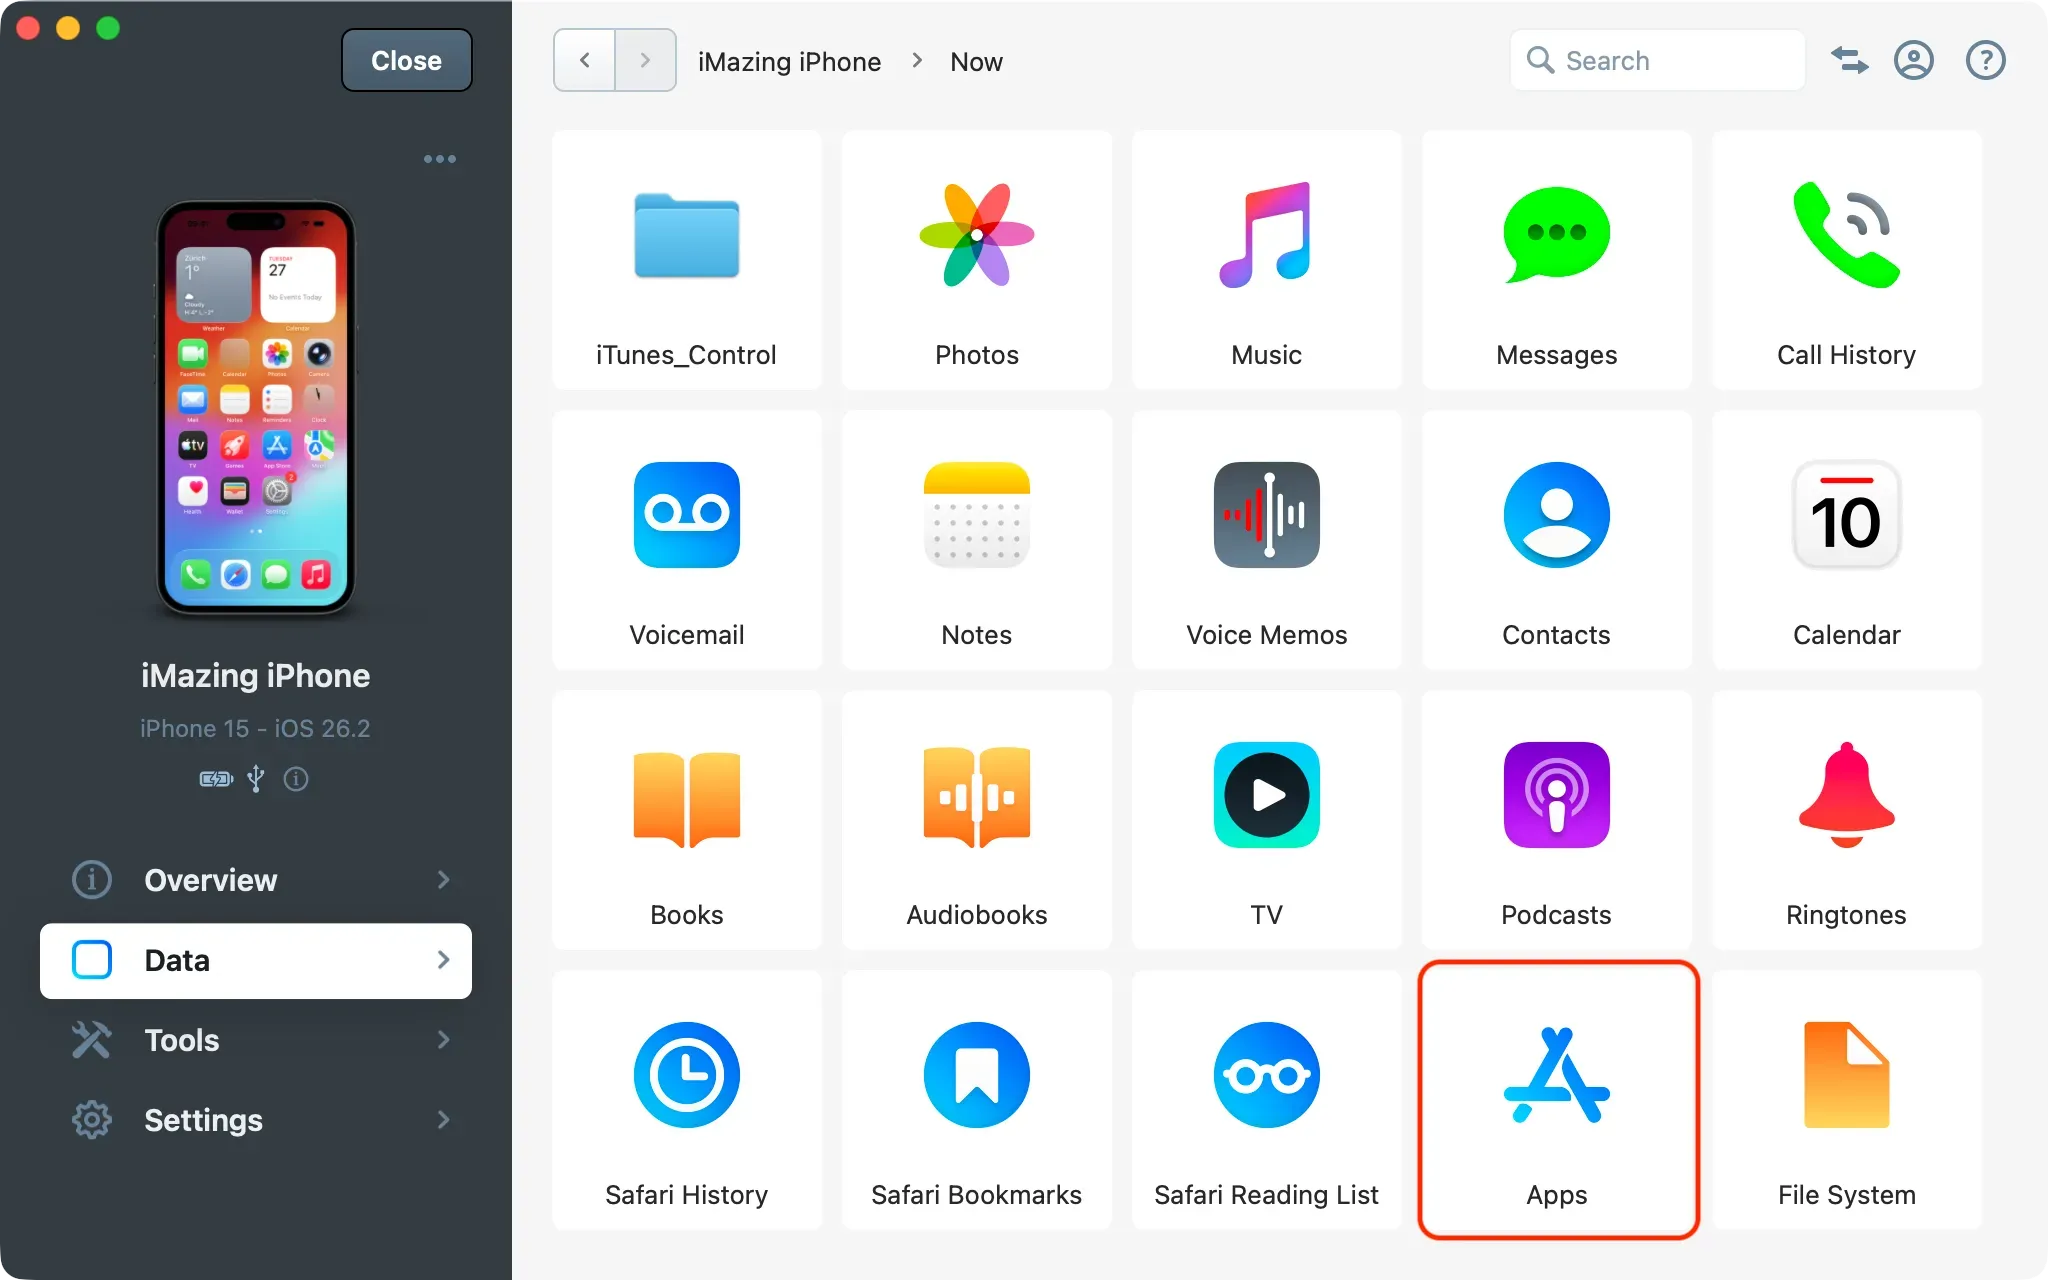
Click Data or Tools in the sidebar to access all available datasets and tools for that device.
Navigate to the Apps view
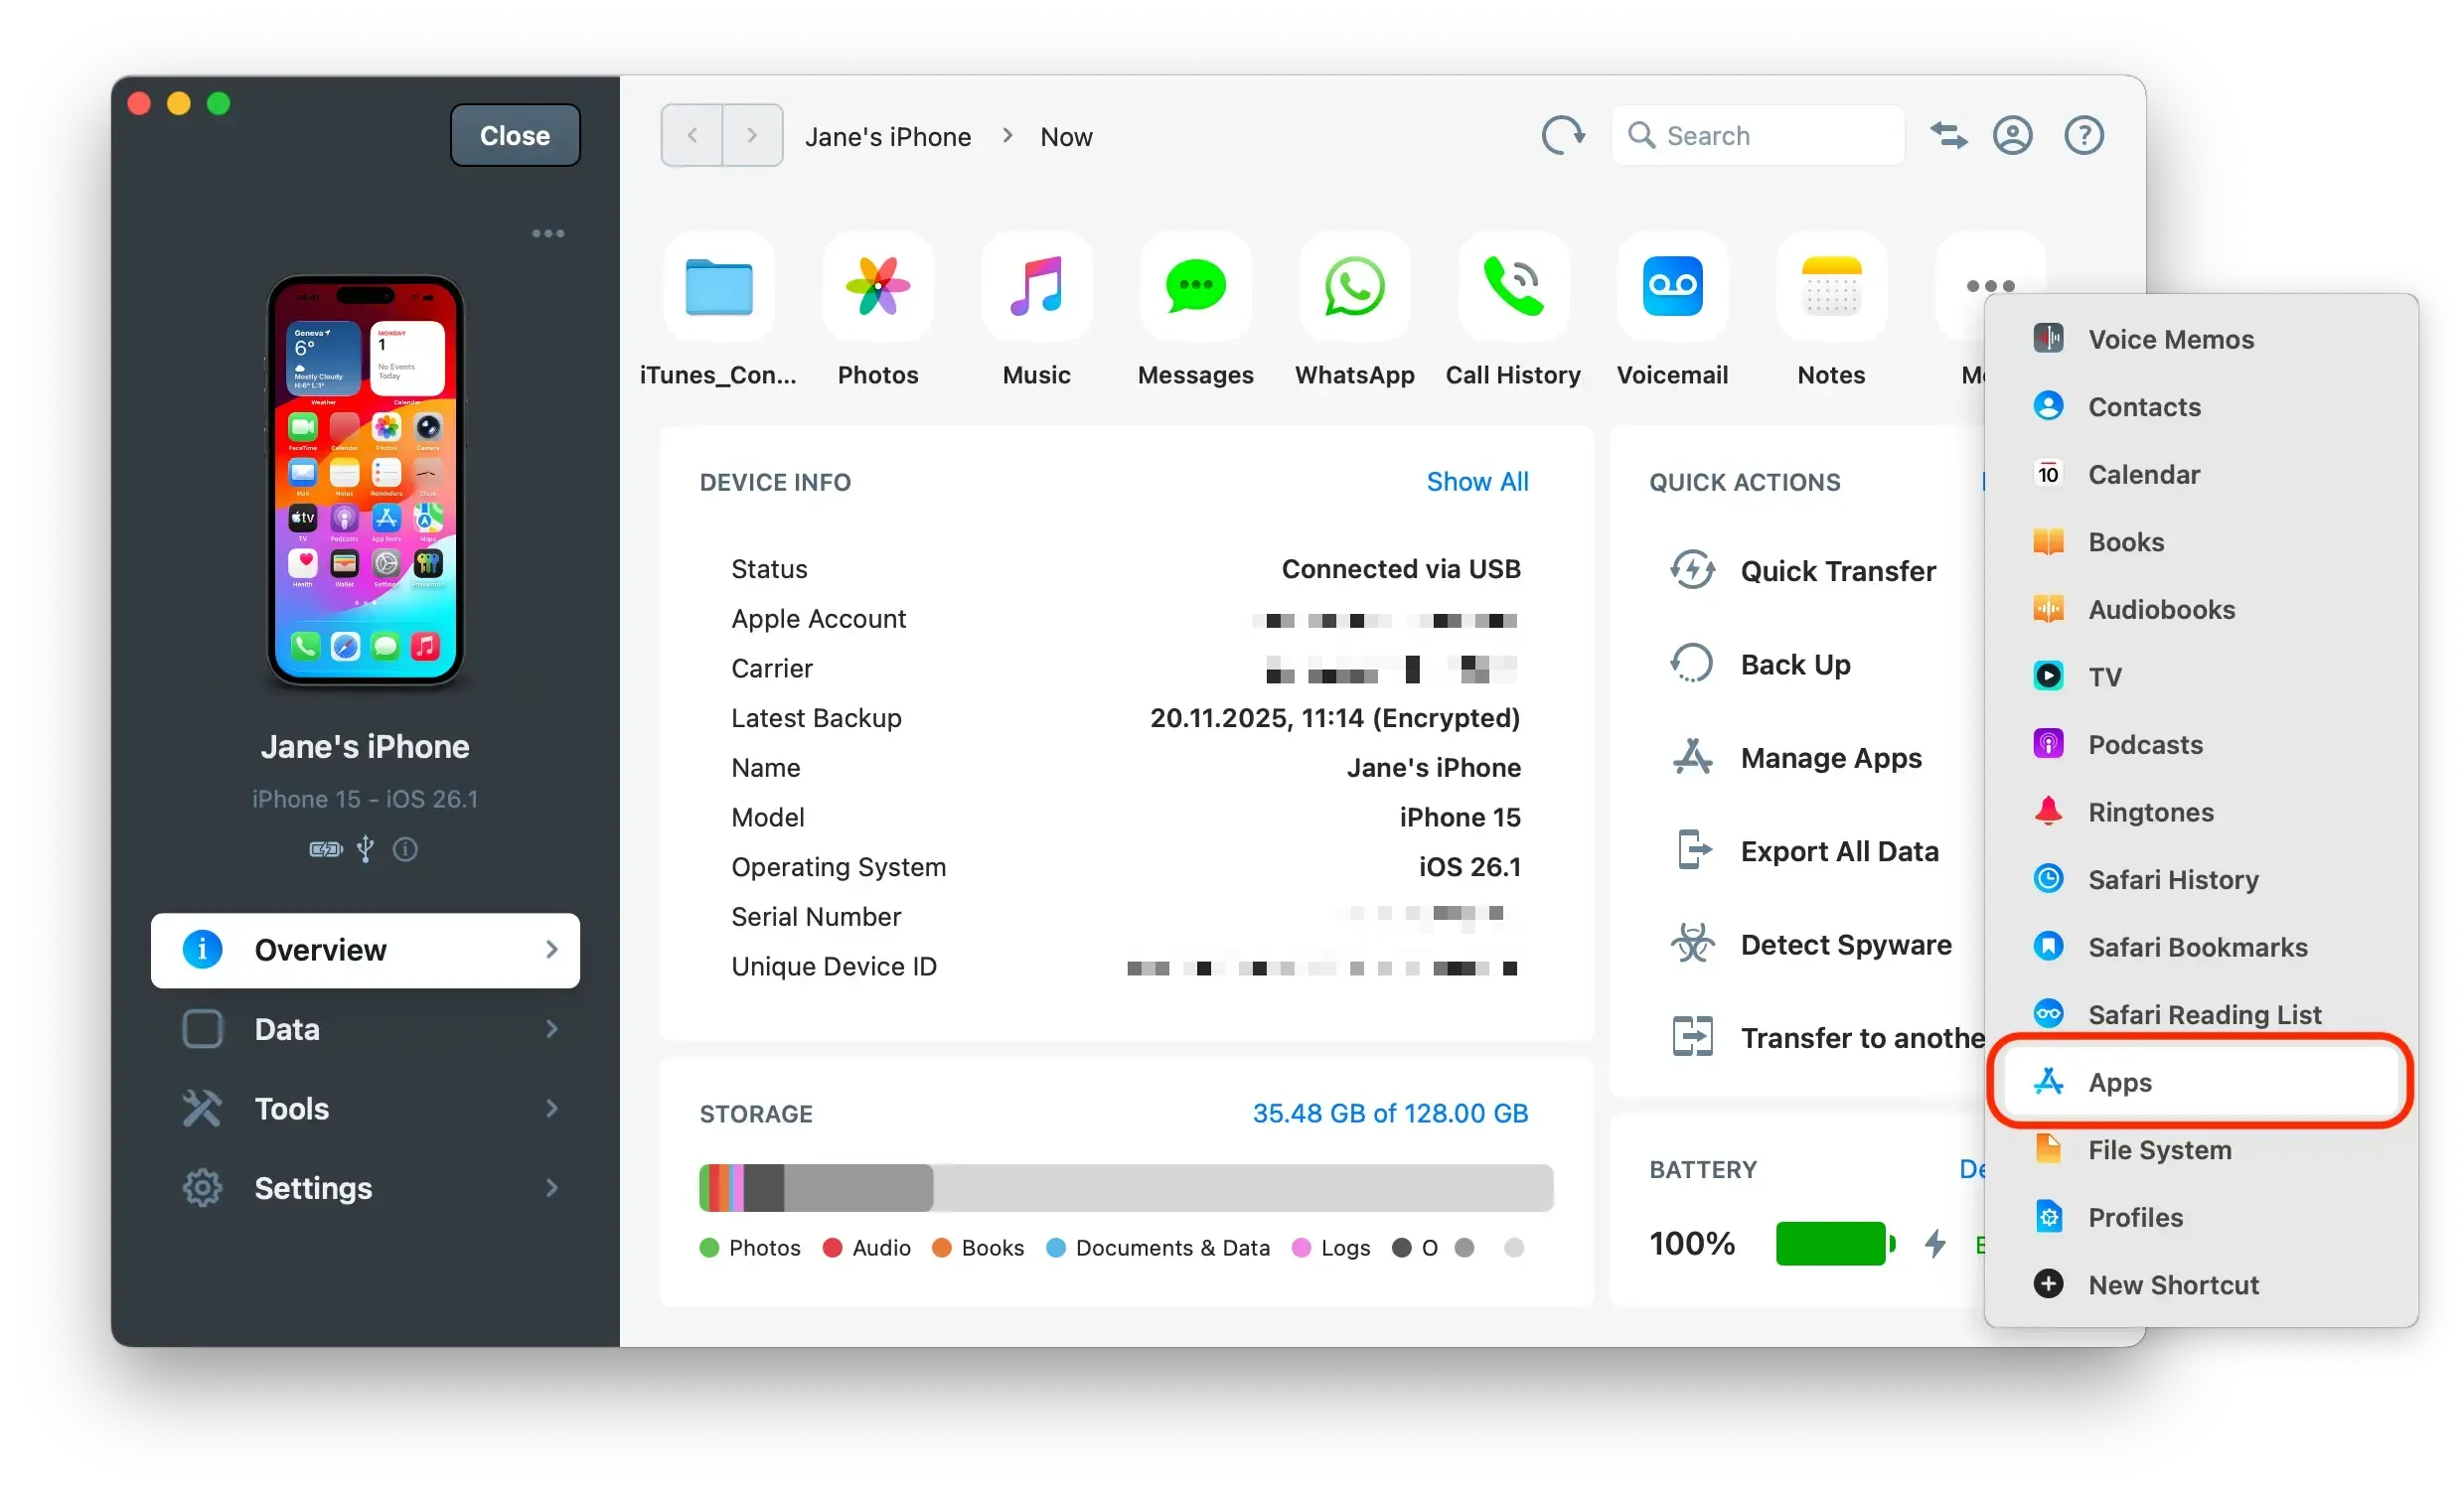
In the sidebar, click Data to open the Data section, then select Apps.
Tip: You can also access the Apps view directly from the device's Overview section: in the Data Shortcuts row, click More, then select Apps from the menu.
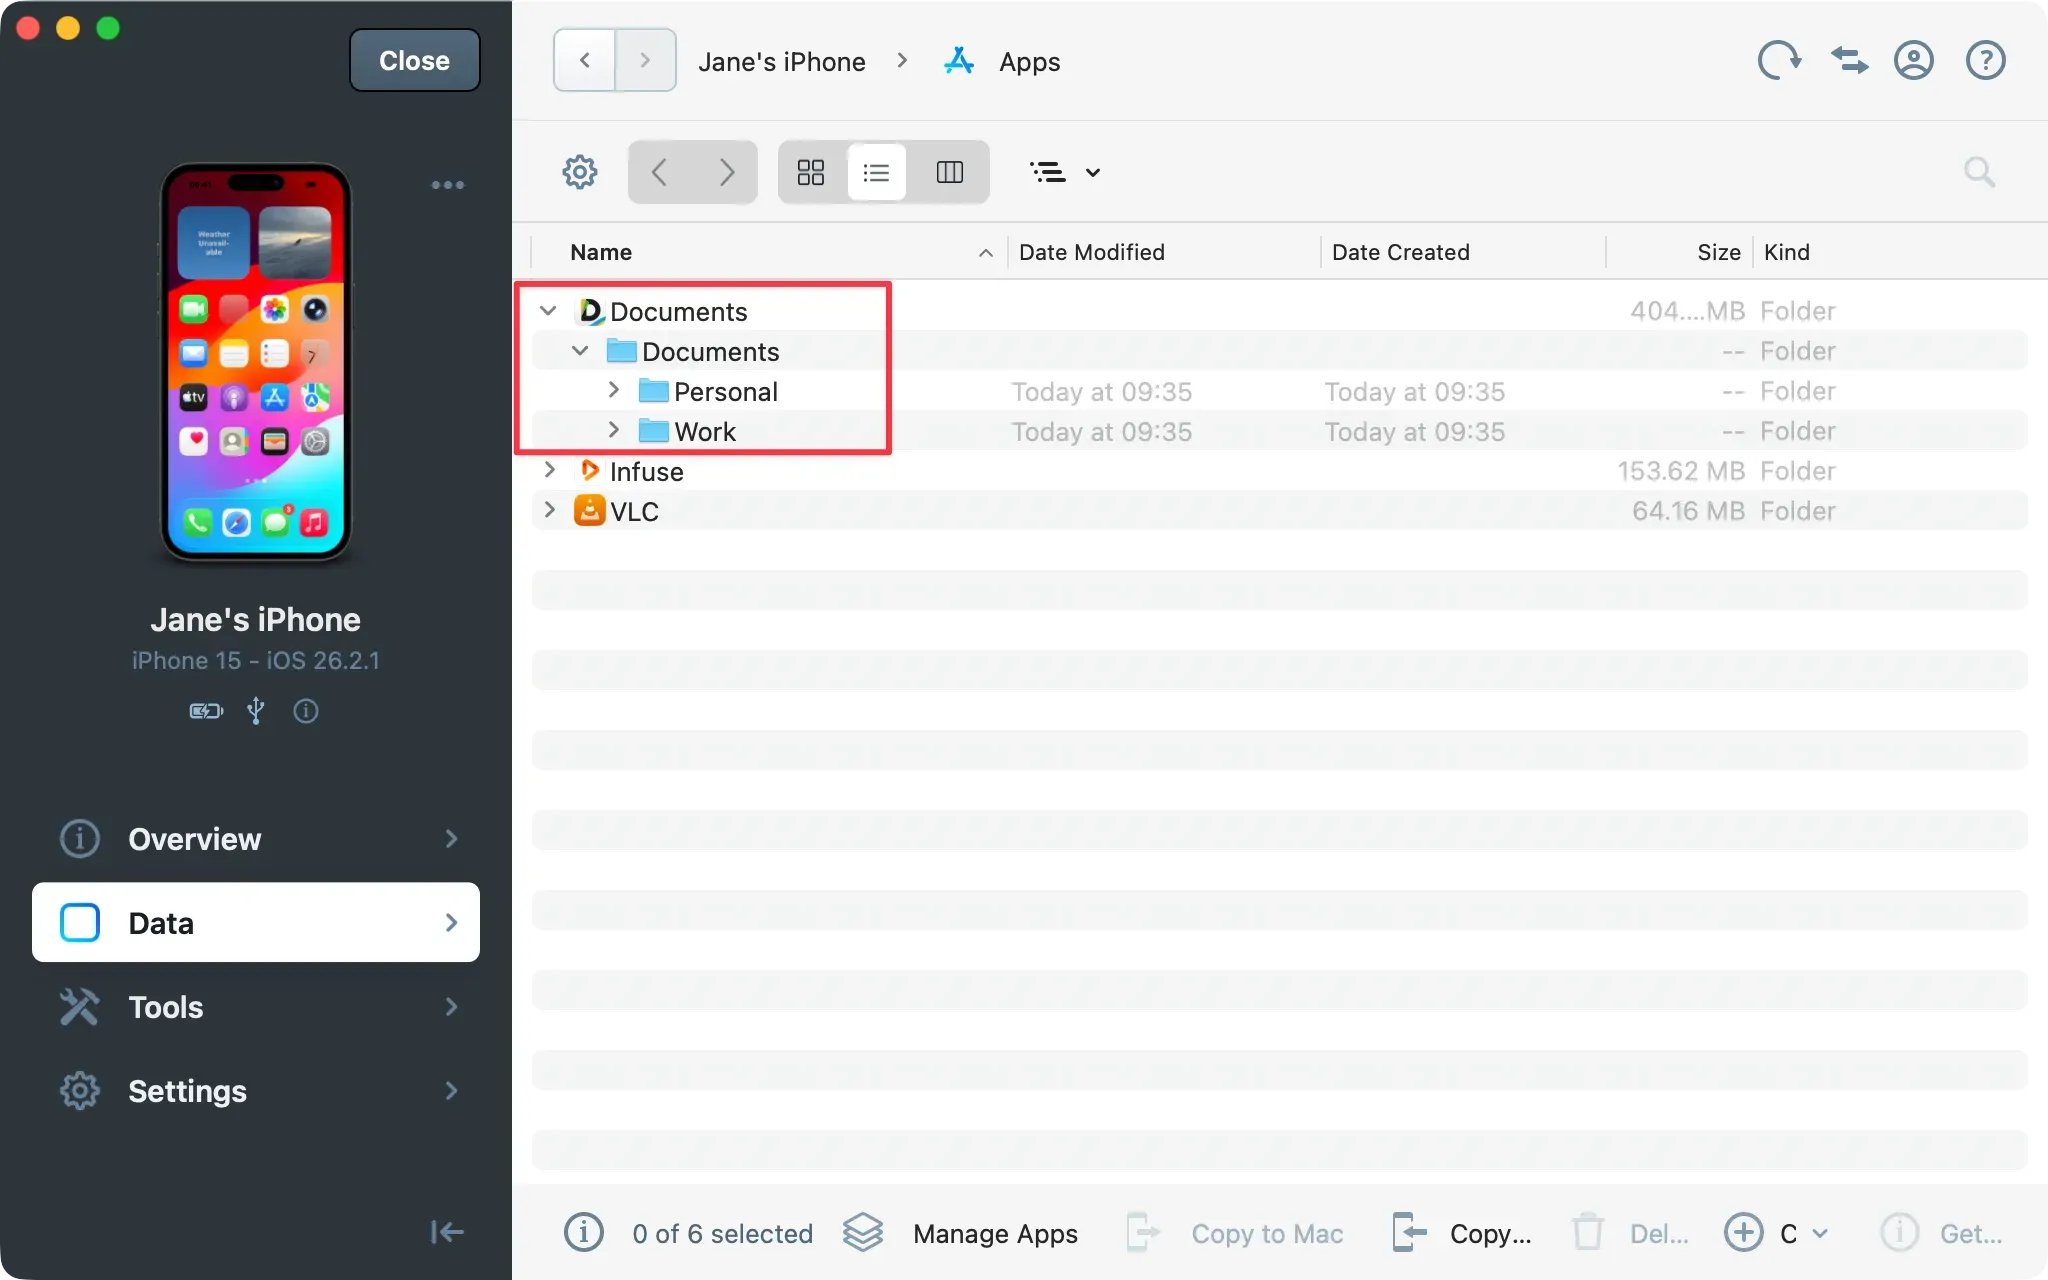
Manage your App Files
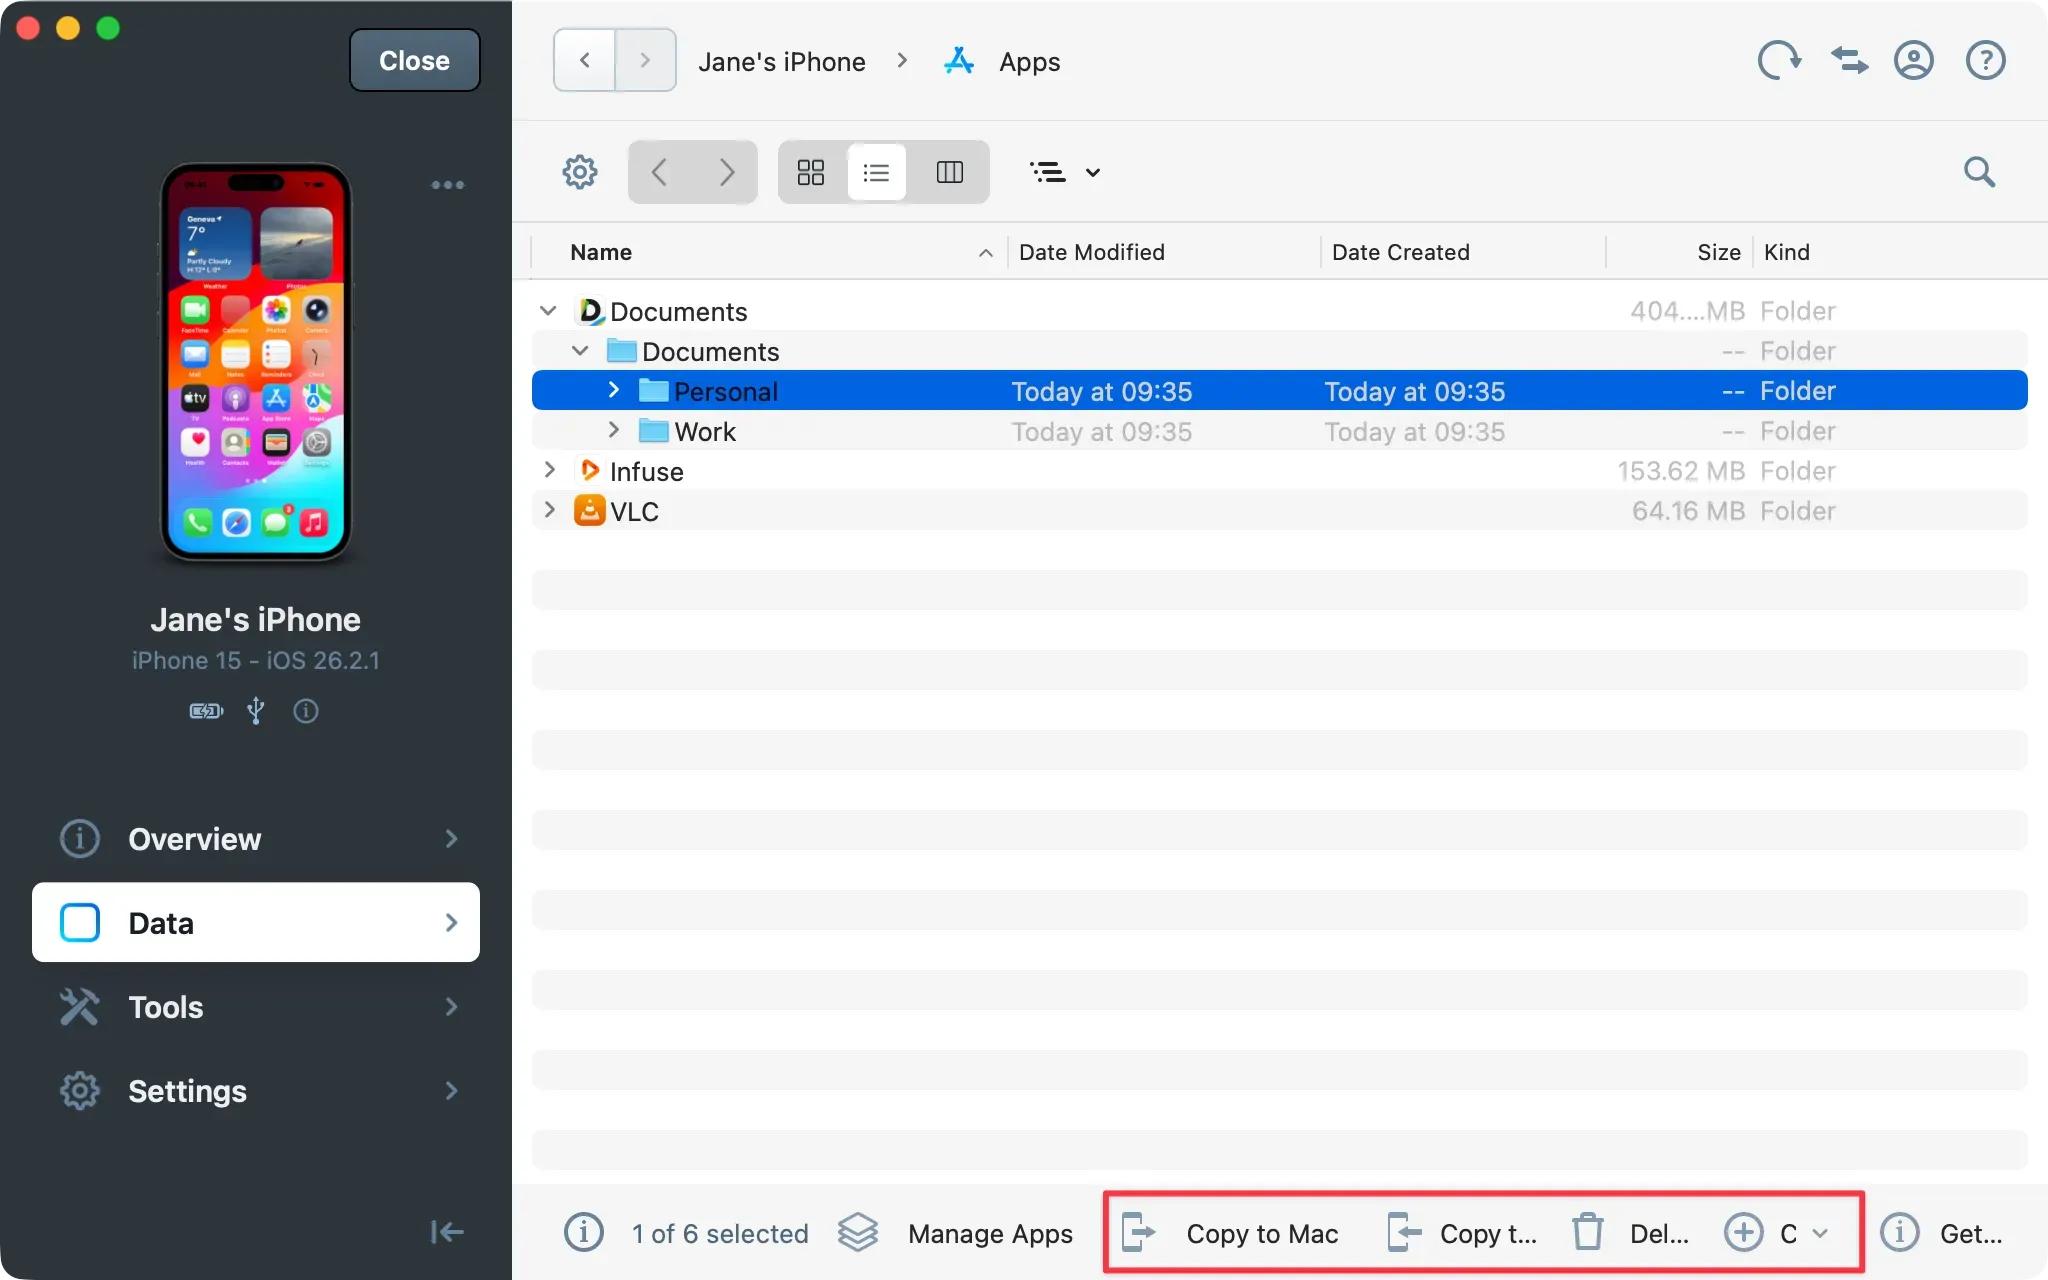
In iMazing's main window, select your application and navigate to its Documents folder.
In the bottom toolbar, click one of the action buttons of your choice:
Copy to Mac/PC – transfer files to your Mac or PC computer.
Copy to Device – transfer files to your iPhone, iPad or iPod touch.
Delete – delete files from your iPhone, iPad or iPod touch.
New Folder – create a new folder on your iPhone, iPad or iPod touch.
Tips:
You can drag and drop files and folders from the Documents folder to your computer, and vice versa.
To quickly access your favorite apps, add them as a shortcut
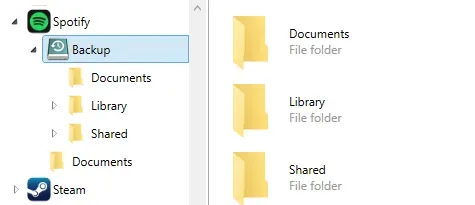
Backup Folder
If you've backed up your device, you'll notice that you have a Backup folder in addition to the app's Documents folder.
In this folder, you can browse backed up app files from the backup folder, even if the app is not sharing enabled. This is a great way to access data that is usually hidden, and find out precisely which files are included in your backups.
What to keep in mind
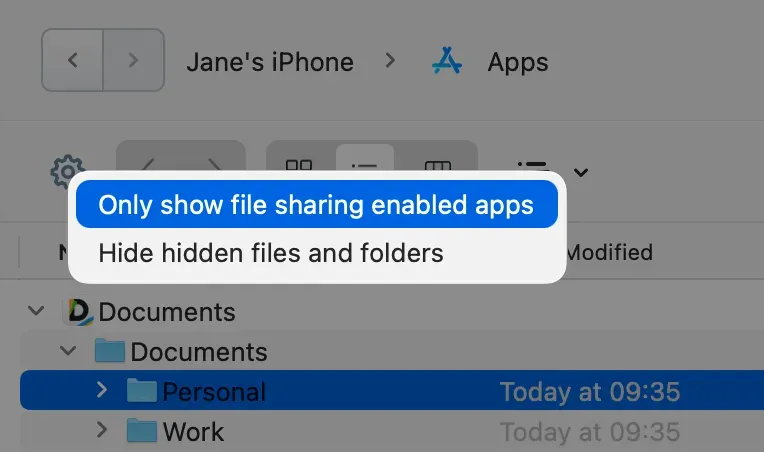
Not all apps support file sharing; it's up to the app's developer to enable file sharing.
You can filter out apps which are not compatible with file sharing: click Options in the bottom toolbar, and select Only show sharing enabled apps.
If your device is running iOS 8.2 or below, the sandbox of all applications is fully accessible. To protect user privacy, Apple disabled this in iOS 8.3.
There are many more Apps who enable File Sharing. Here is a non-exhaustive list :
Nextcloud
DJI
Word
Excel
PowerPoint
iMovie
Pages
Numbers
Keynote
Chrome
Firefox
Edge
Panels
Tip: App developers can enable file sharing by adding the boolean key UIFileSharingEnabled and setting it to YES in their app's Info.plist file. This allows iMazing to access the app's container Documents folder.
To learn more about interaction with files in the Apps view, see our guide on File Browsing.